How to Add a 'Made by Human' Badge to Your Next.js or React Website
A quick technical guide on integrating our responsive, theme-aware SVG badges into modern React and Next.js applications.
Adding a Made by Human badge to your website is one of the easiest ways to demonstrate transparency to your visitors. Because all our badges are available as optimized, light/dark-mode compatible SVGs, you can integrate them seamlessly into your Next.js or React codebase.
In this guide, we'll walk through the recommended ways to embed the badges, including a responsive, theme-aware React component.
Option 1: Simple HTML Embed (Recommended for simplicity)
If you just want to drop a static image into your site's footer, you can copy-paste our pre-built HTML code. We host the SVG badges on GitHub's fast CDN so you don't even need to download any assets.
Here is the code for the standard Made by Human badge:
<a href="https://madebyhuman.iamjarl.com" target="_blank" rel="noopener noreferrer">
  <img
    src="https://raw.githubusercontent.com/JarlLyng/madebyhuman/main/public/badges/made-white.svg"
    alt="Made by Human Badge"
    width="180"
    height="60"
  />
</a>
Option 2: Responsive React Component (Theme-Aware)
If your website supports dark mode and light mode, you can create a reusable React component that automatically switches between the white and black badge variants.
First, download the SVG badges you need from our Badges page and place them in your /public/badges/ directory (e.g., made-white.svg and made-black.svg).
Here is a sample React component using Tailwind CSS and standard state or Tailwind's dark: classes:
import Image from 'next/image';

interface BadgeProps {
  variant?: 'made' | 'created' | 'crafted' | 'loop';
  width?: number;
  height?: number;
}

export default function MadeByHumanBadge({
  variant = 'made',
  width = 180,
  height = 60
}: BadgeProps) {
  return (
    <a
      href="https://madebyhuman.iamjarl.com"
      target="_blank"
      rel="noopener noreferrer"
      className="inline-block hover:opacity-80 transition-opacity"
    >
      {/* Light Mode Badge (Visible on Light Themes) */}
      <Image
        src={`/badges/${variant}-white.svg`}
        alt="Made by Human Badge"
        width={width}
        height={height}
        className="h-auto w-auto dark:hidden"
      />
      {/* Dark Mode Badge (Visible on Dark Themes) */}
      <Image
        src={`/badges/${variant}-black.svg`}
        alt="Made by Human Badge"
        width={width}
        height={height}
        className="h-auto w-auto hidden dark:block"
      />
    </a>
  );
}
Option 3: Embed in Markdown (For READMEs)
If you want to add the badge to your project's GitHub README or any markdown file, use the following code:
[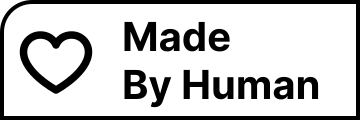](https://madebyhuman.iamjarl.com)
Best Practices for Badges
- Link Back to the Site: Always wrap the badge image in a link pointing to
https://madebyhuman.iamjarl.com. This allows interested visitors to click the badge to learn more about the manifesto and the meaning of the specific badge you chose. - Alt Text: Use descriptive alt text such as
"Made by Human Badge"or"Co-created with AI transparency badge"to keep your website accessible. - Correct Badge Variant: Make sure the badge you choose aligns with your actual development process. For example, if you use AI extensively to co-write your application, the Co-created with AI badge is the most transparent choice.